


In this article, we'll look at creating an API using the Python package, Flask, using MongoDB for our database, creating Postman tests and running everything with Docker.
You can find all the code I'll go through in my example-api repo:
Setting up the containers
First, we'll set up the containers using docker-compose. In a new project folder, create a docker-compose.yml file with the following:
version: '3.9'

services:

  db:
    image: mongo:5.0
    ports:
      - 27017:27017
    networks:
      - backend
    env_file: .env

  api:
    build: ./
    ports:
      - 5000:5000
    volumes:
      - ./src:/src
    networks:
      - frontend
      - backend
    env_file: .env

  postman:
    image: postman/newman:alpine
    command:
      run ${POSTMAN_COLLECTION} -k
      -r cli,json
      --reporter-json-export="reports/api_test_report.json"
    volumes:
      - ./tests:/etc/newman
    depends_on:
      - "api"
      - "db"
    networks:
      - backend

networks:
  frontend:
  backend:
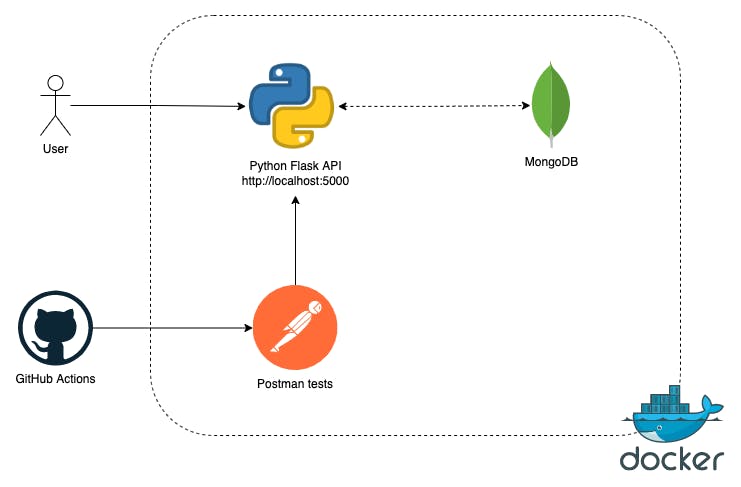
We have 3 containers:
db- Used for our database, running a MongoDB imageapi- Used for our Flask API, built from aDockerfilepostman- Used for testing our API, executing postman collection tests
Flask API
For the Flask API, create a Dockerfile with the following:
FROM python:3.8-slim-buster

WORKDIR /app

COPY src/requirements.txt .
RUN pip install --no-cache-dir -r requirements.txt

COPY src/ .

CMD [ "python3", "-m" , "flask", "run", "--host=0.0.0.0"]
Create a new src folder in the project folder with a requirements.txt file:
mkdir src
touch requirements.txt
For the contents of requirements.txt add the following:
flask
flask-pymongo
These packages will be installed when our container is built.
Next, we need to create the app, create an app.py file in the src folder with the following:
import os
import json
from flask import Flask, request
from flask_pymongo import PyMongo
from bson import json_util, ObjectId

MONGODB_URI = os.environ.get("MONGODB_ENDPOINT")

app = Flask(__name__)
app.config["MONGO_URI"] = MONGODB_URI
mongo = PyMongo(app)

def parse_json(data):
    return json.loads(json_util.dumps(data))

@app.route('/')
def hello_world():
    return 'Hello, World!'

@app.route('/items', methods=['GET'])
def get_all_items():
    items = list(mongo.db.items.find())
    return parse_json(items), 200

@app.route('/items', methods=['POST'])
def create_item():
    item = request.get_json()
    inserted_item = mongo.db.items.insert_one(item)
    return parse_json(inserted_item.inserted_id), 201

@app.route('/items/<item_id>', methods=['GET'])
def get_item(item_id):
    item = mongo.db.items.find_one_or_404({'_id': ObjectId(item_id)})
    return parse_json(item), 200

@app.route('/items/<item_id>', methods=['PUT'])
def update_item(item_id):
    item = request.get_json()
    item_id_obj = ObjectId(item_id)
    result = mongo.db.items.update_one({'_id': item_id_obj}, {'$set': item})
    if result.matched_count == 0:
        return parse_json({'error': 'Item not found'}), 404
    updated_item = mongo.db.items.find_one({'_id': item_id_obj})
    return parse_json({'message': 'Item updated successfully', 'item': updated_item}), 200

@app.route('/items/<item_id>', methods=['DELETE'])
def delete_item(item_id):
    item_id_obj = ObjectId(item_id)
    result = mongo.db.items.delete_one({'_id': item_id_obj})
    if result.deleted_count == 0:
        return parse_json({'error': 'Item not found'}), 404
    return parse_json({'message': 'Item deleted successfully'}), 200

if __name__ == "__main__":
    app.run(debug=True)
This is our entire app. At the top of the script, we're importing the required packages, initialising the Flask App and MongoDB instance.
We have a parse_json function for formatting the response from MongoDB, a hello_world function and CRUD operations for creating, reading, updating and deleting records.
You can see in the script, we're using an environmental variable, os.environ.get("MONGODB_ENDPOINT") . To set this, create a .env file in the project root directory with the following:
MONGODB_ENDPOINT=mongodb://db:27017/example
POSTMAN_COLLECTION=Example_API.postman_collection.json
Make Commands
Finally, create a Makefile in the project root directory with the following:
DOCKER_COMPOSE = docker-compose up -d
POSTMAN_COLLECTION ?=

.PHONY: rebuild
rebuild:
    docker-compose up -d --build

.PHONY: start
start: _start_api _start_db

.PHONY: stop
stop:
    docker-compose down

.PHONY: tests
tests:
    @echo "Running tests"
    docker-compose up postman

_start_api:
    $(DOCKER_COMPOSE) api

_start_db:
    $(DOCKER_COMPOSE) db
This Makefile allows us to easily start and stop the docker containers.
Our start command only starts the api and db containers. The postman container will only run when we execute the tests method, which runs the tests immediately and will then terminate the container.
Running the API
By now, your project directory should look like this:
.
├── Dockerfile
├── Makefile
├── docker-compose.yml
├── .env
└── src
    ├── app.py
    └── requirements.txt
We can now run the API!
To build and start the API, run:
make start
Go to localhost:5000. You should see a "Hello, World!" message:
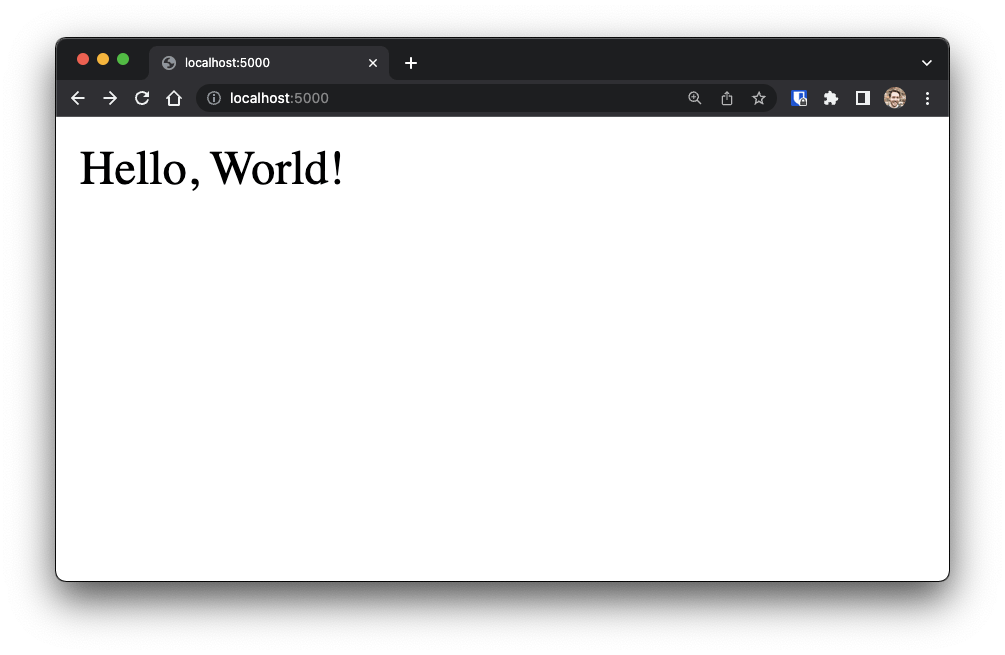
🎉 The API is up and running!
The API has the following endpoints available:
| Endpoint | Method | Description |
/ | GET | Hello World |
/items | GET | Get All Items |
/items/{id} | GET | Get Item |
/items | POST | Create Item |
/items/{id} | PUT | Update Item |
/items/{id} | DELETE | Delete Item |
If you want to add tests to your API, keep reading!
Testing the API
With the API up and running, we can write our Postman tests.
Open Postman and create a New Collection.
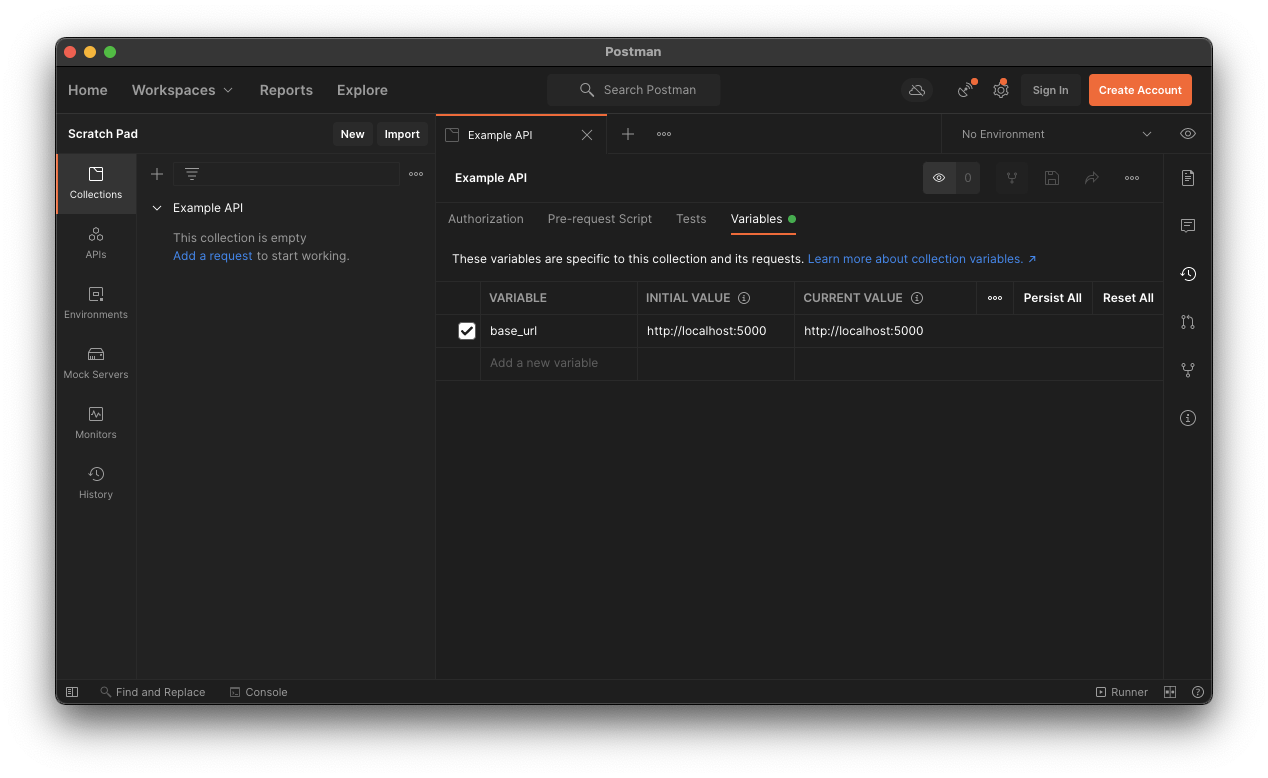
Click the collection name and go to the Variables tab.
Create a new variable called base_url with the initial and current value, http://localhost:5000. Click the 💾 Save icon.
Click Add a request and create a request called 'Hello World'. This will be a get request. Set the request URL to {{base_url}}, this will use the value from our collection variable. Click Save and Send.
Postman will execute the request and you will see the response from your API below:
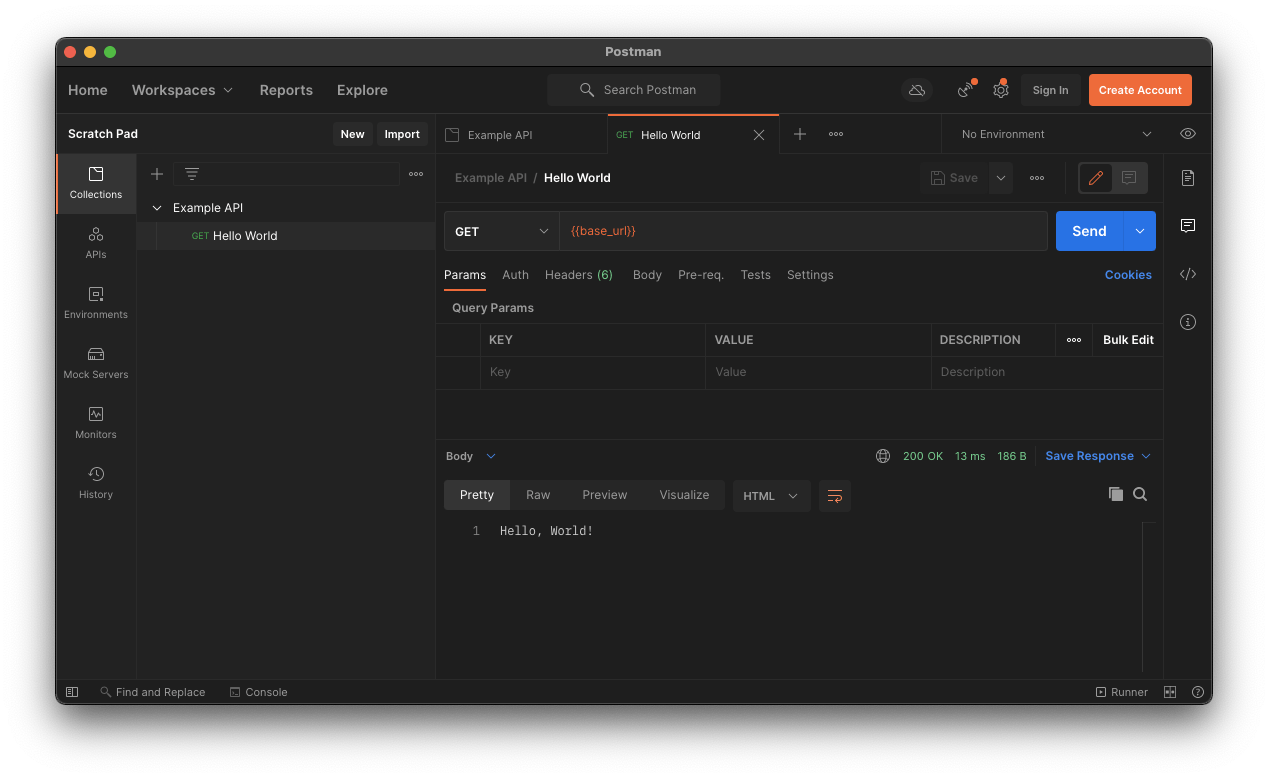
Open the Tests tab. On the right, there is a SNIPPETS toolbar. In the list, click Status code: Code is 200. This will add a test like this:
pm.test("Status code is 200", function () {
    pm.response.to.have.status(200);
});
Click Save and Send. The test will be run and shown in the output panel, in the Test Results tab:

We've now set up a test for our Hello World endpoint. Now we need to create tests for the other endpoints.
Repeat this process, creating a new request and test for each of the endpoints:
Get All Items
Request Name: GET All Items
Request Method: GET
Request URL: {{base_url}}/items
Test:
pm.test("Status code is 200", function () {
    pm.response.to.have.status(200);
});
Create Item
Request Name: CREATE Item
Request Method: POST
Request URL: {{base_url}}/items
Test:
pm.test("Status code is 201", function () {
    pm.response.to.have.status(201);
});
pm.test("Returned item id", function () {
    jsonData = pm.response.json()
    pm.collectionVariables.set("item_id", jsonData.$oid);
});
For this test, the successful response status code after item creation is 201. We also have a second test to obtain the returned item_id of our created item and set it as a collection variable. We can then use the value on future tests.
Body:
As this is a POST request, we will be sending through content to create the item. In the Body tab, click raw and paste the following:
{
    "title": "Hello, World!"
}
This content will be sent to our API when the request is executed.
Get Item
Request Name: GET Item
Request Method: GET
Request URL: {{base_url}}/items/{{item_id}}
Test:
pm.test("Status code is 200", function () {
    pm.response.to.have.status(200);
});
pm.test("Returned result matches test item", function () {
    jsonData = pm.response.json()
    item_id = pm.collectionVariables.get("item_id");
    pm.expect(jsonData._id.$oid).to.eql(item_id);
    pm.expect(jsonData.title).to.eql("Hello, World!");
});
This request uses the saved item_id from the collection values. In the tests, we are checking the response is successful (200) and verifying the returned item_id and content matches what we created in the Create Item test.
Update Item
Request Name: UPDATE Item
Request Method: PUT
Request URL: {{base_url}}/items/{{item_id}}
Test:
pm.test("Status code is 200", function () {
    pm.response.to.have.status(200);
});
pm.test("Result contains updated item", function () {
    jsonData = pm.response.json()
    item_id = pm.collectionVariables.get("item_id");
    pm.expect(jsonData.item._id.$oid).to.eql(item_id);
    pm.expect(jsonData.item.title).to.eql("Hello, there!");
});
Again, this request uses the saved item_id from the collection values. This time we're checking the returned item_id matches the item we modified, and the title matches the updated value from our request Body.
Body:
{
    "title": "Hello, there!"
}
Delete Item
Request Name: DELETE Item
Request Method: DELETE
Request URL: {{base_url}}/items/{{item_id}}
Test:
pm.test("Status code is 200", function () {
    pm.response.to.have.status(200);
});
Executing all the tests
With all the requests and tests added to our collection, we can run them all together.
Click the three dots next to the collection name and click Run collection. Click Run Example API to execute all the tests.
Postman will run through the tests on your API and provide a summary:
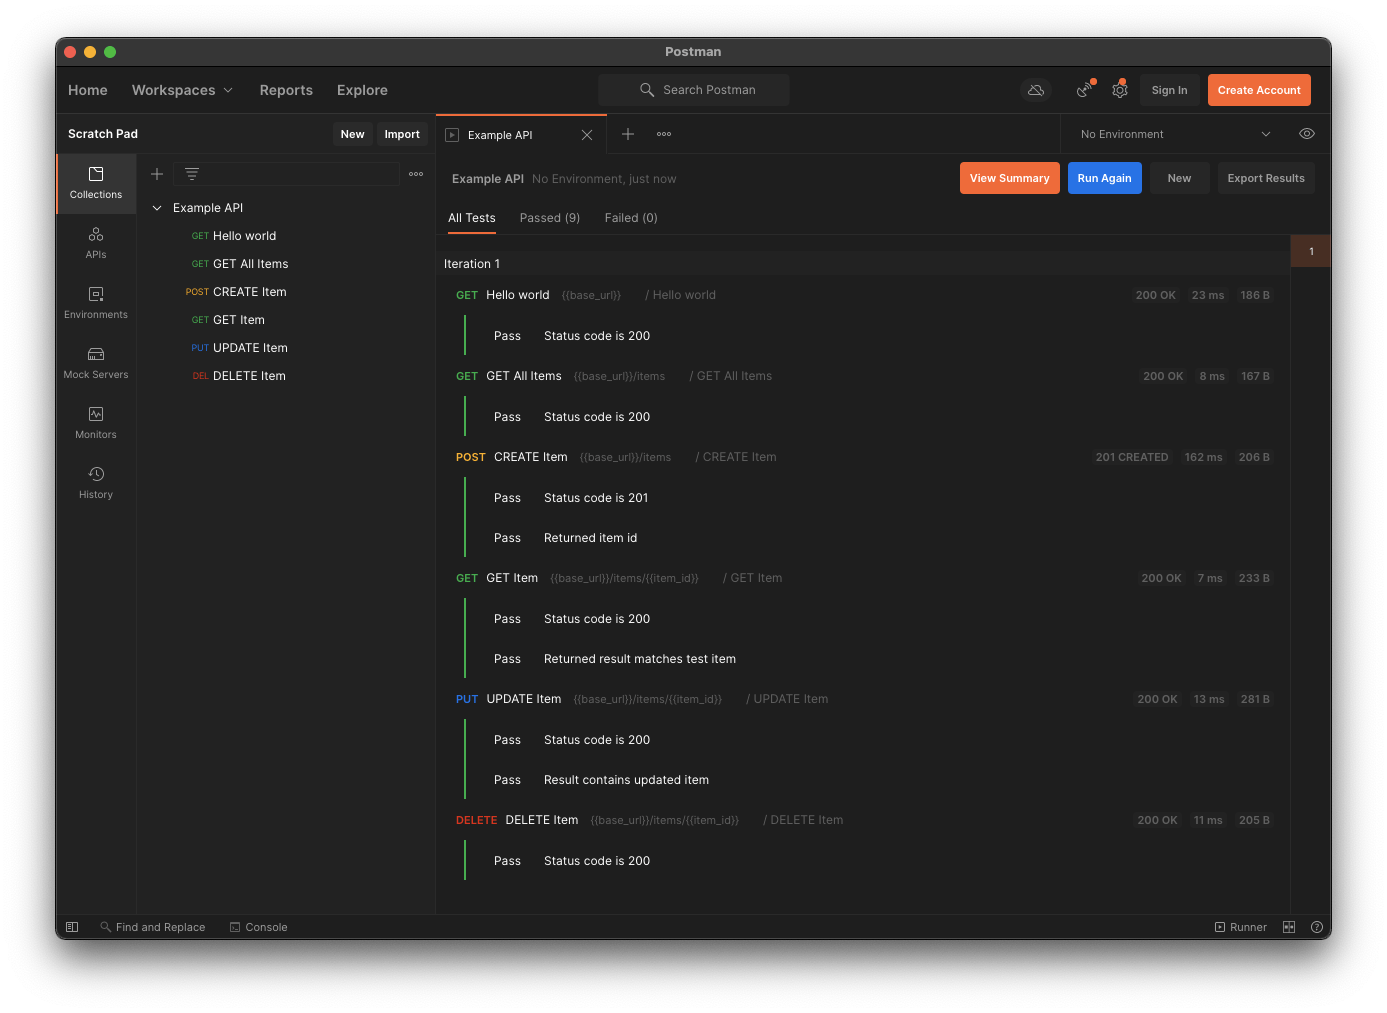
✅ If everything is set up correctly, all tests should be successful!
Automating the tests
The Postman collection containing the requests and tests can be exported by clicking the three dots next to the collection name and Export. Export the collection to your project folder, into a new folder called tests. Name the collection Example API.postman_collection.json.
With the collection in our project we can run make tests. This will run the postman container and execute the tests. You may notice all the tests have failed. This is because the base_url variable is set to http://localhost:5000 and when running from the postman container, the Flask API is unreachable.
To fix this, add --env-var "base_url=${API_BASE_URL}" to the postman container defined in docker-compose.yml:
  postman:
    image: postman/newman:alpine
    command:
      run ${POSTMAN_COLLECTION} -k
      --env-var "base_url=${API_BASE_URL}"
      -r cli,json
      --reporter-json-export="reports/api_test_report.json"
    volumes:
      - ./tests:/etc/newman
    depends_on:
      - "api"
      - "db"
    networks:
      - backend
And add API_BASE_URL=http://api:5000 to the .env file:
MONGODB_ENDPOINT=mongodb://db:27017/example
POSTMAN_COLLECTION=Example_API.postman_collection.json
API_BASE_URL=http://api:5000
api refers to the api docker container defined in docker-compose.yml. By using this, the postman container will be able to reach the Flask API. Now re-run make tests and they should all be successful.
GitHub Actions
In the project directory, create a .github folder, a workflows folder within that and a test.yml file:
mkdir .github
mkdir .github/workflows
touch .github/workflows/test.yml
In the .github/workflows/test.yml file, add the following:
name: Test API
on:
  push:
    branches:
      - main
  pull_request:
    branches:
      - main

jobs:
  test-api:
    environment:
      name: tests
    runs-on: ubuntu-latest
    steps:
    - uses: actions/checkout@v2
    - name: Run tests
      run: make tests
Commit and push your changes to GitHub. GitHub Actions will now run make tests when changes are pushed or a pull-request to main is created:
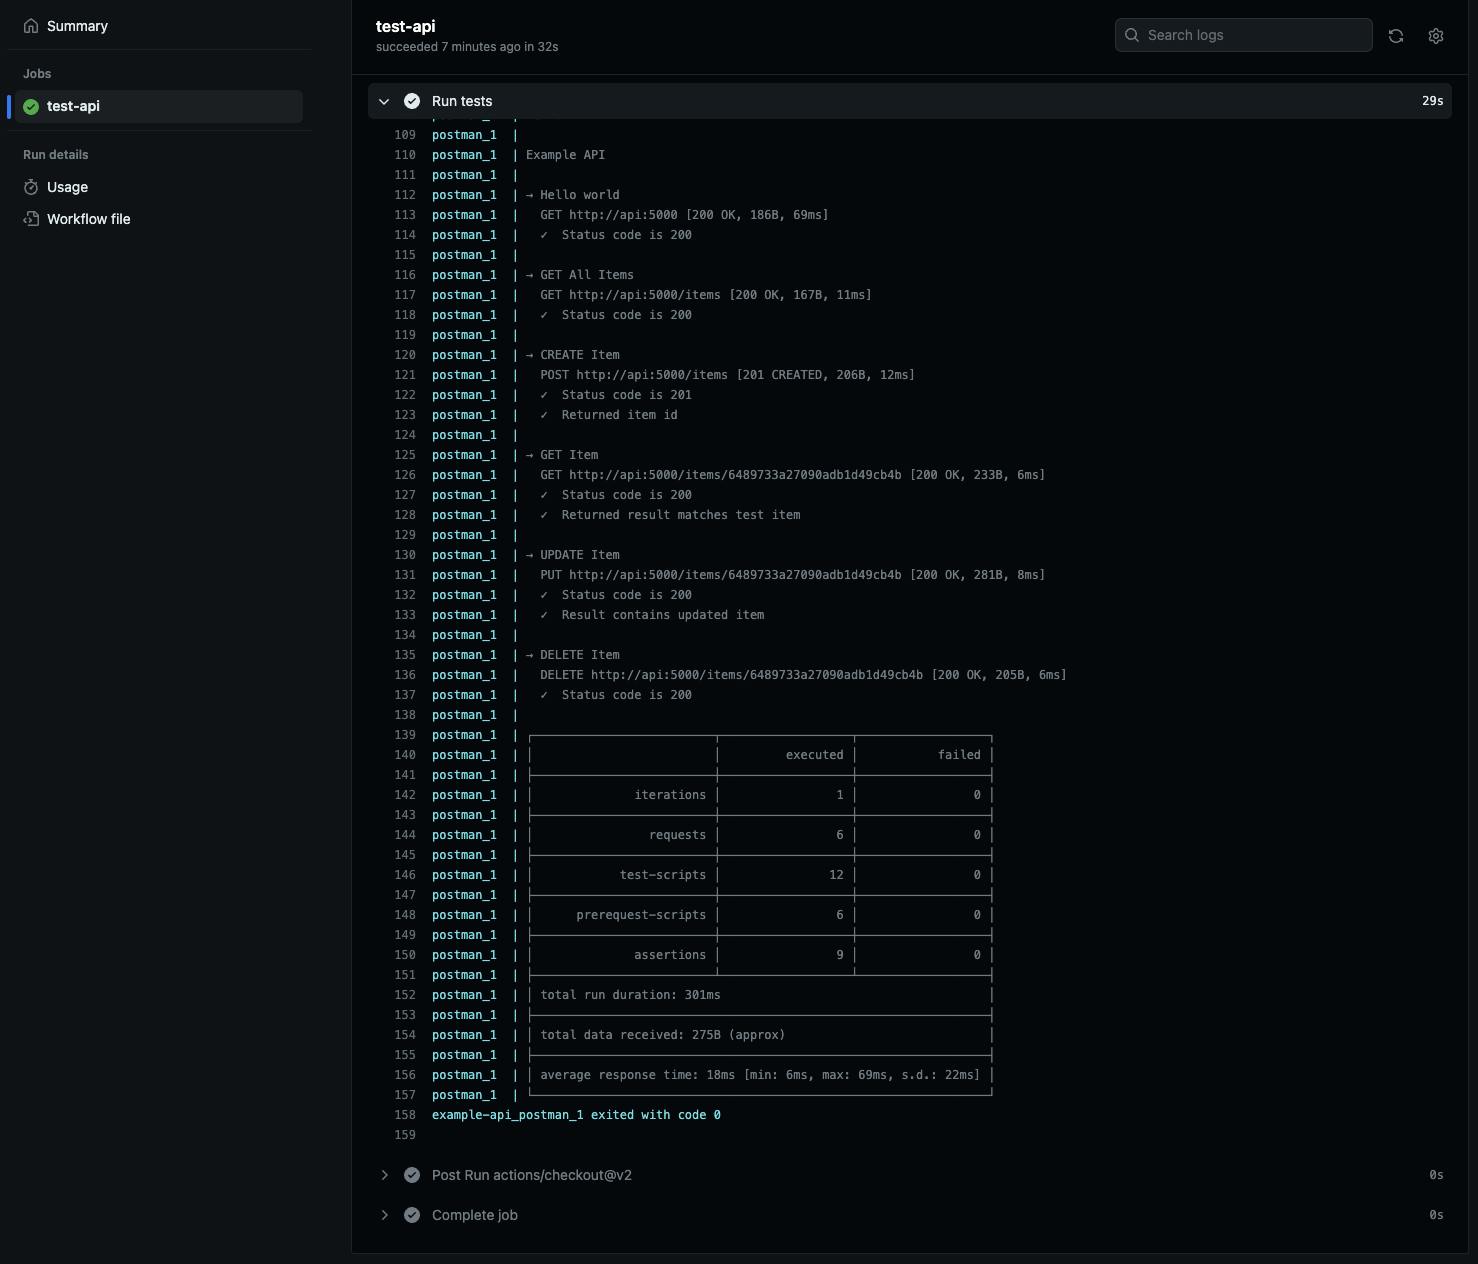
🎉 You now have an example API with automated tests!
If you got stuck with any steps or just want the complete solution, refer to, or clone my example-api repo.